


The next explanations are based on this project
Angular handles forms in two ways:
- Reactive forms: Allow us to manipulate the form object on ts files.
- Template-driven forms: There is no explicit form object, instead there is an implicit one manipulable with directives.
We will add some bootstrap classes that we will use to show alert styles in validation message boxes. So in the index.html we add the bootstrap cdn and it will be applied to the entire app:
// index.html
<!doctype html>
<html lang="en">
<head>
  <meta charset="utf-8">
  <title>AngularForms</title>
  <base href="/">
  <meta name="viewport" content="width=device-width, initial-scale=1">
  <link rel="icon" type="image/x-icon" href="favicon.ico">
  <link rel="stylesheet" href="https://cdn.jsdelivr.net/npm/bootstrap@5.1.3/dist/css/bootstrap.min.css" integrity="sha384-1BmE4kWBq78iYhFldvKuhfTAU6auU8tT94WrHftjDbrCEXSU1oBoqyl2QvZ6jIW3" crossorigin="anonymous">
</head>
<body>
  <app-root></app-root>
</body>
</html>
Angular applies some classes to form elements that describe their state: ng-touched (or ng-untouched if the control hasn't been visited), ng-dirty(or ng-pristine if the control's value hasn't changed), ng-valid ( or ng-invalid if the control's value isn't valid) and ng-submitted if the form has been submitted.
To add some styles to these angular-specific classes we will do it in the styles.scss file that applies styles to the entire app:
// styles.scss
/* You can add global styles to this file, and also import other style files */
.form-control {
  border-width: 2px;
  &.ng-touched {
    border-color: rgba(30, 110, 214, 1);
  }
  &.ng-dirty {
    border-color: rgba(162, 143, 56, 1);
  }
  &.ng-invalid {
    border-color: rgba(214, 30, 30, 1);
  }
}
Reactive forms: The first thing we will do is to add ReactiveFormsModule on the module that will declare the component that uses the form to use reactive form controls:
// users-reactive.module.ts
import { NgModule } from '@angular/core';
import { ReactiveFormsModule } from '@angular/forms';
import { UsersReactiveComponent } from './users-reactive.component';
import { SharedModule } from '../shared/shared.module';


@NgModule({
  declarations: [UsersReactiveComponent],
  imports: [
    ReactiveFormsModule,
    SharedModule
  ]
})
export class UsersReactiveModule { }
Second, we create a FormGroup in the ts file to associate with the form in the html file:
// users-reactive.component.ts
import { Component, OnInit } from '@angular/core';
import { FormControl, FormGroup, Validators } from '@angular/forms';
@Component({
selector: 'app-users-reactive',
templateUrl: './users-reactive.component.html',
styleUrls: ['./users-reactive.component.scss'],
})
export class UsersReactiveComponent implements OnInit {
userForm: FormGroup;
videogames: string[];
constructor() {
this.userForm = new FormGroup({
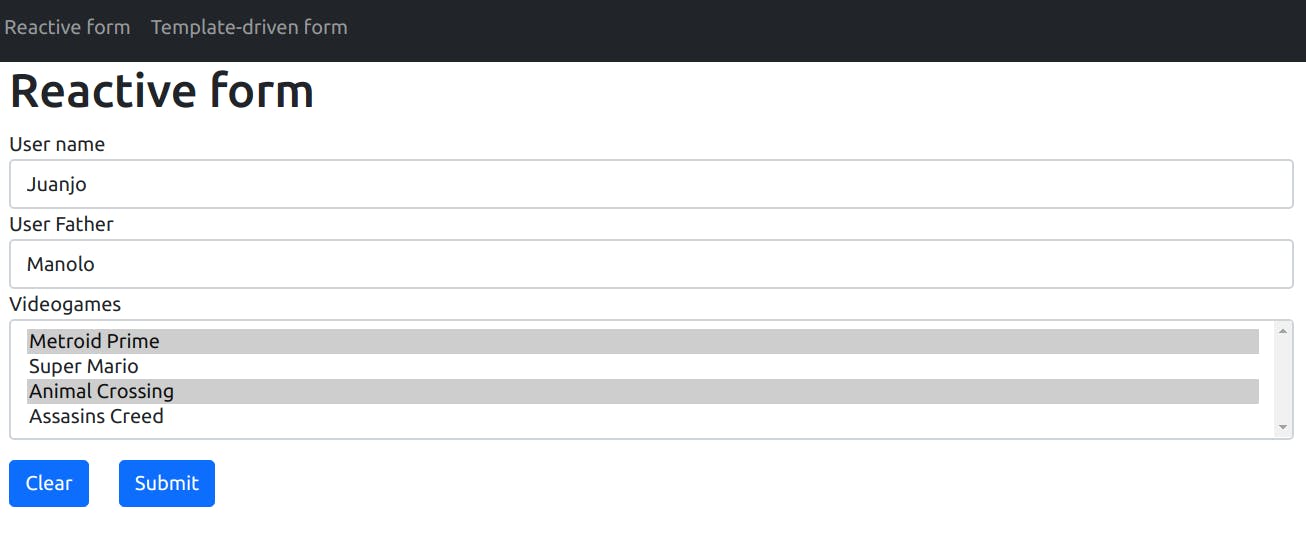
name: new FormControl('Juanjo', Validators.required),
father: new FormControl('Manolo'),
videogames: new FormControl(
['Metroid Prime', 'Animal Crossing'],
Validators.required
),
});
this.videogames = [
'Metroid Prime',
'Super Mario',
'Animal Crossing',
'Assasins Creed',
];
}
ngOnInit(): void {}
onSubmit() {
if (this.userForm.valid) {
console.log(this.userForm.value);
}
}
onClear() {
this.userForm.reset();
}
findControl(controlName: string) {
return this.userForm.get(controlName) as FormControl;
}
}
- The videogames variable contains the videogames displayed as options on a select element.
- On the FormGroup variable (userForm) we have defined some FormControls and on each one, we defined a default value and in two of them a required validator.
- The onSubmit function simply displays the form value if the form is valid (validation requirements are met).
- The onClear funtions resets the form.
- We also define a findControl method that takes a controlName and gives us the control itself. This allows us to access control statuses on the html to make conditions.
The html is as follows:
// users-reactive.component.html
<h1>Reactive form</h1>
<form [formGroup]="userForm" (ngSubmit)="onSubmit()">
  <div class="form-group">
    <label for="name">User name</label>
    <input class="form-control" type="text" id="name" formControlName="name" />
    <app-validation-message
      [message]="'User name is required'"
      [hidden]="findControl('name').valid"
    ></app-validation-message>
  </div>
  <div class="form-group">
    <label for="father">User Father</label>
    <input
      class="form-control"
      type="text"
      id="father"
      formControlName="father"
    />
  </div>
  <div class="form-group">
    <label for="toys">Videogames</label>
    <select
      class="form-control"
      id="videogames"
      formControlName="videogames"
      multiple
    >
      <option *ngFor="let videogame of videogames" [value]="videogame">
        {{ videogame }}
      </option>
    </select>
    <app-validation-message
      [message]="'Videogame is required'"
      [hidden]="findControl('videogames').valid"
    ></app-validation-message>
  </div>
  <div class="form-group row mt-3">
    <div class="col-sm-1">
      <button type="button" class="btn btn-primary" (click)="onClear()">
        Clear
      </button>
    </div>
    <div class="col-sm-1">
      <button type="submit" class="btn btn-primary">Submit</button>
    </div>
  </div>
</form>
- We assing the FormGroup variable (userForm) to the [formGroup] one-way data binding available from ReactiveFormsModule. With this, we tell input elements the control name they have to use to asssign themselves the apropiated control.
- The formControlName directive value must coincide with the FormGroup name defined in the FormGroup object in the ts file (name, father, and videogames).
- We also see that app-validation-message component is shown if the control is invalid.
- Clear button calls the onClear functions that resets the form as we see earlier.
- Submit button triggers ngSubmit event and this calls the obSubmit functions which logs the form value.
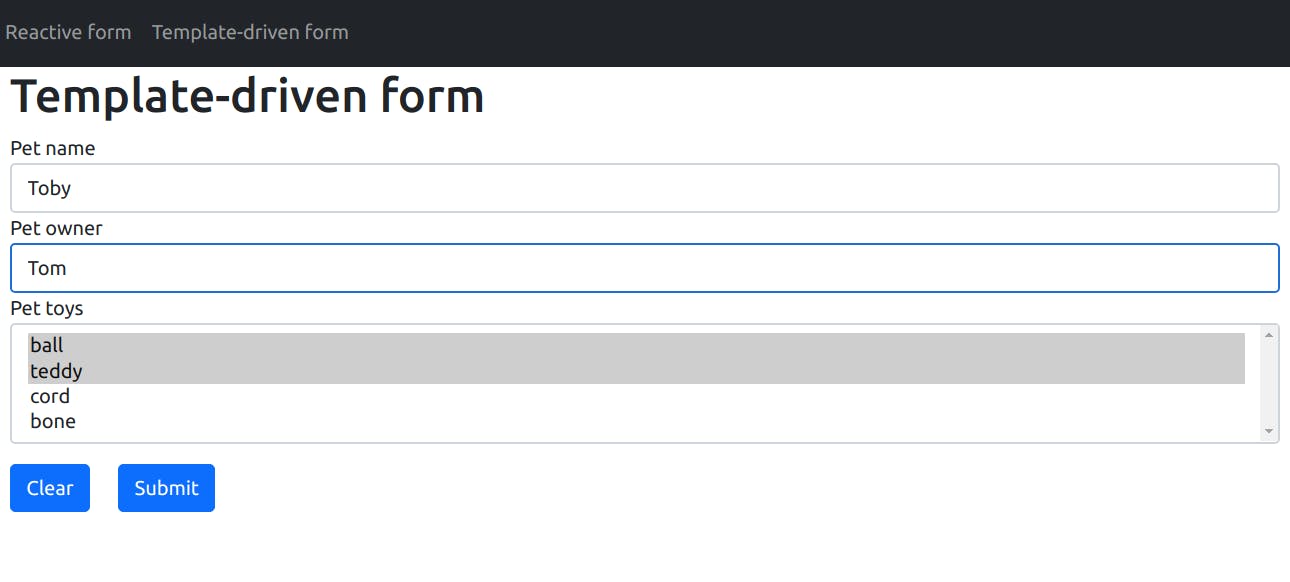
This is the form shown by default:
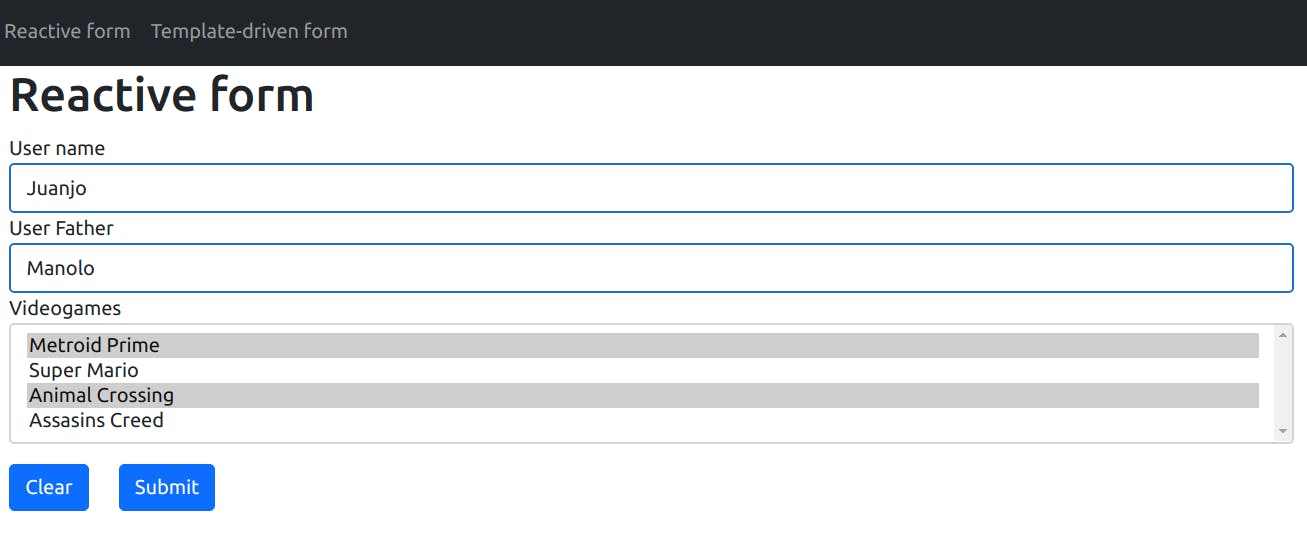
This is the form if some of the fields are touched (blue color on borders):
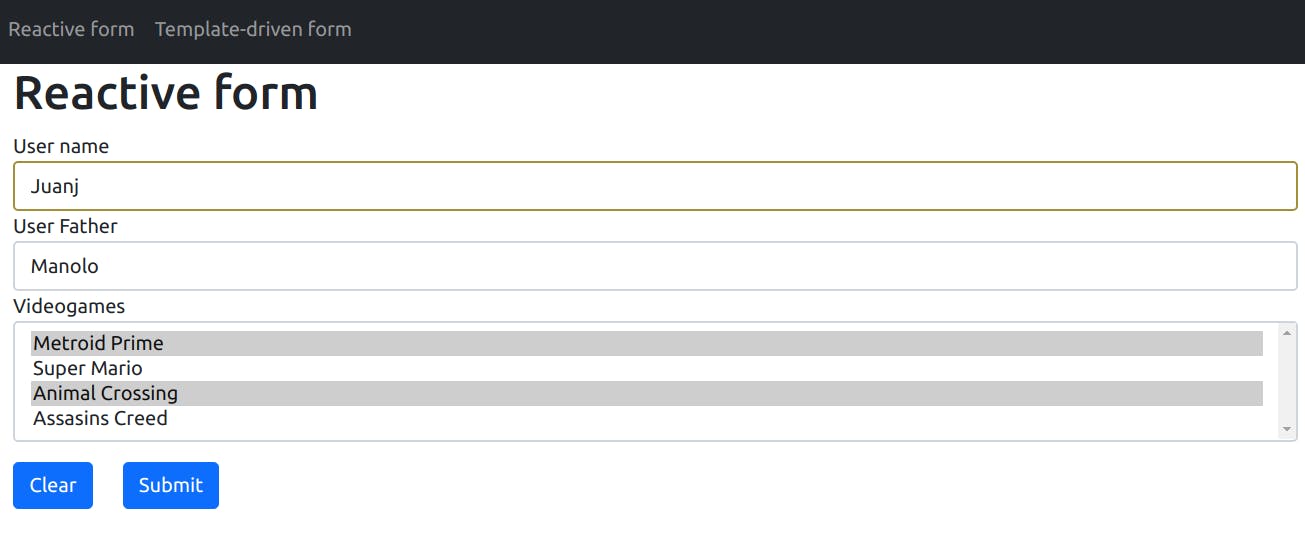
This is the form if some of the fields are modified:
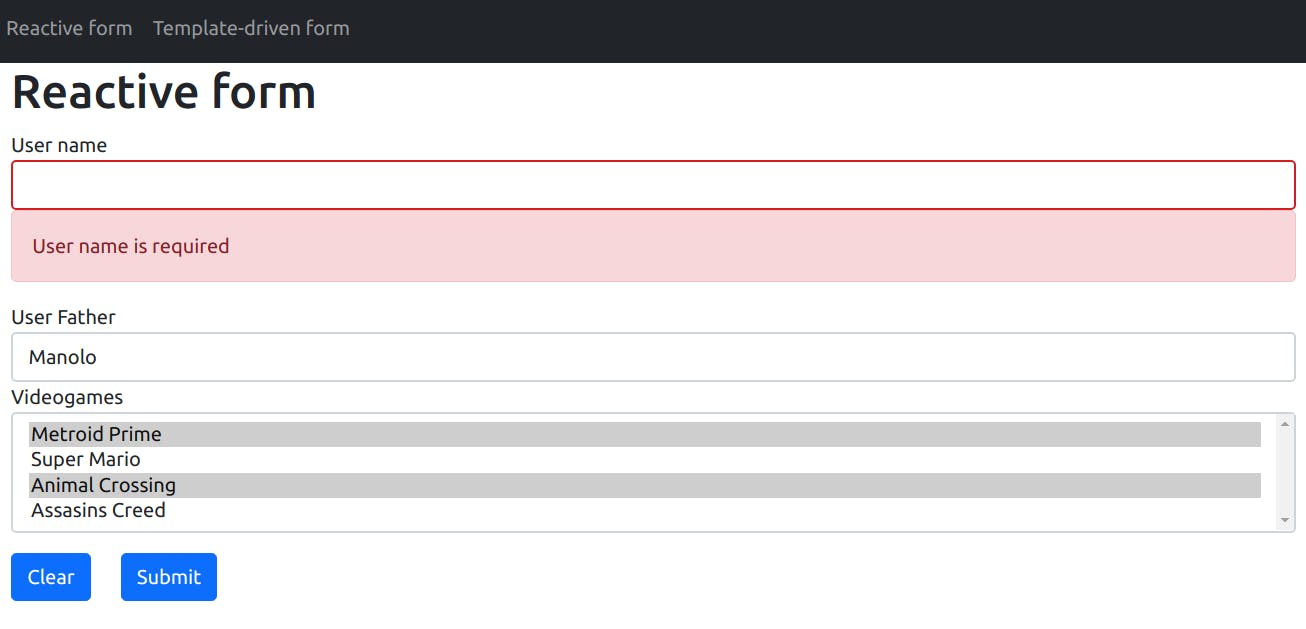
This is the form if some of the required fields are empty:
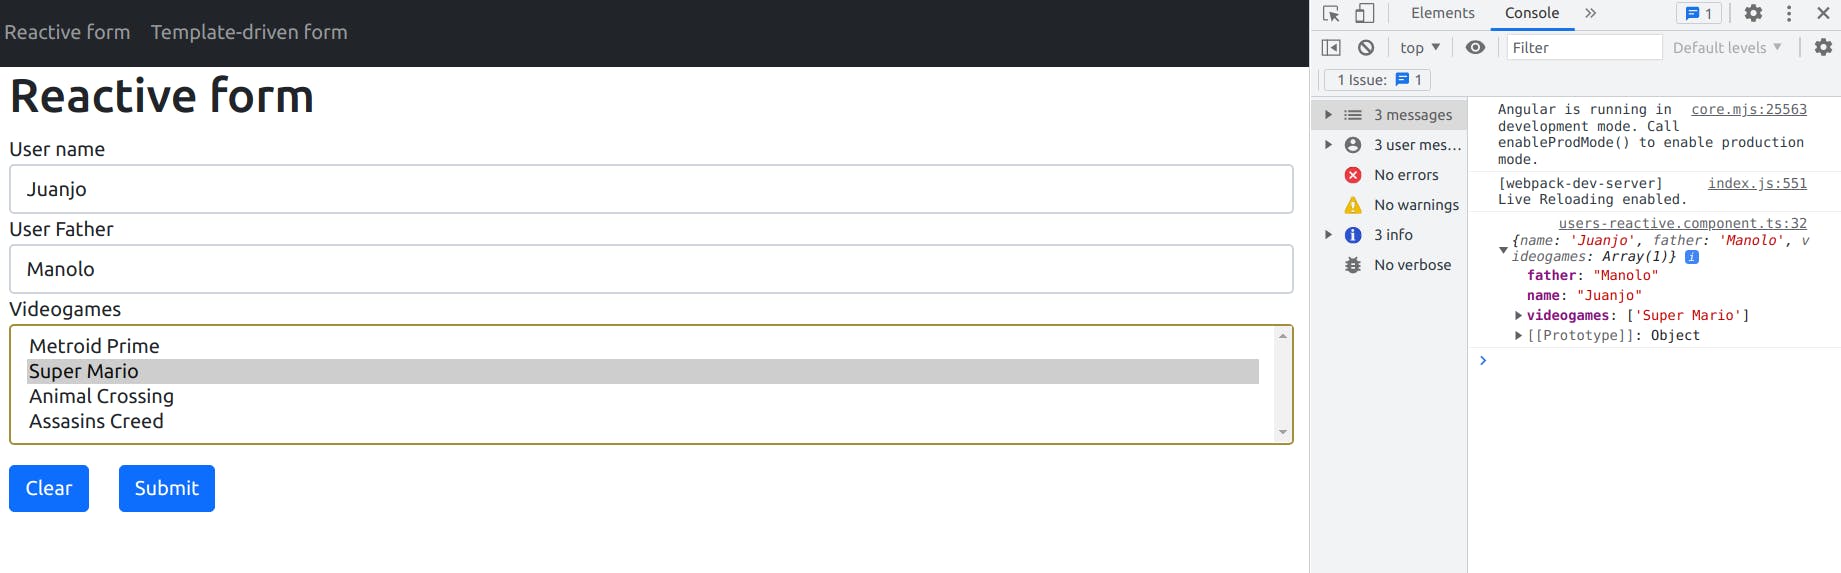
And this is the result of submitting the form on console:
Template-driven forms:
These forms rely on directives defined in the FormsModule: NgModel, NgForm and NgModelGroup. The first thing we will do is import FormsModule on the module that will declare the component that uses the form, this way we will be able to use mentioned directives:
// pets-template-driven.module.ts
import { NgModule } from '@angular/core';
import { FormsModule } from '@angular/forms';
import { PetsTemplateDrivenComponent } from './pets-template-driven.component';
import { SharedModule } from '../shared/shared.module';


@NgModule({
  declarations: [PetsTemplateDrivenComponent],
  imports: [
    FormsModule,
    SharedModule
  ]
})
export class PetsTemplateDrivenModule { }
With all the needed styles in place we create the template-driven form html file:
// pets-template-driven.component.html
<h1>Template-driven form</h1>
<form #petForm="ngForm" (ngSubmit)="onSubmit(petForm.form)">
  <div class="form-group">
    <label for="name">Pet name</label>
    <input
      class="form-control"
      type="text"
      id="name"
      name="passedName"
      [(ngModel)]="actualPet.name"
      #nameModel="ngModel"
      required
    />
    <app-validation-message
      [message]="'Pet name is required'"
      [hidden]="nameModel.valid"
    ></app-validation-message>
  </div>
  <div class="form-group">
    <label for="owner">Pet owner</label>
    <input
      class="form-control"
      type="text"
      id="owner"
      name="owner"
      [(ngModel)]="actualPet.owner"
    />
  </div>
  <div class="form-group">
    <label for="toys">Pet toys</label>
    <select
      class="form-control"
      id="toys"
      name="toys"
      [(ngModel)]="actualPet.toys"
      #toysModel="ngModel"
      multiple
      required
    >
      <option *ngFor="let toy of toys" [value]="toy">{{ toy }}</option>
    </select>
    <app-validation-message
      [message]="'Pet toy is required'"
      [hidden]="toysModel.valid"
    ></app-validation-message>
  </div>
  <div class="form-group row mt-3">
    <div class="col-sm-1">
      <button type="button" class="btn btn-primary" (click)="petForm.reset()">
        Clear
      </button>
    </div>
    <div class="col-sm-1">
      <button type="submit" class="btn btn-primary">Submit</button>
    </div>
  </div>
</form>
We are going to examine the form directives, attributes, bindings, and events.
- The form tag:
- It has a template reference variable called #petForm assigned to the ngForm directive, this way we can access the form from the template.
- We are using it on (ngSubmit) event to pass the FormGroup to the onSubmit function when the user submits the form.
- We also use it in the clear button to allow resetting the form when clicking it.
- It has a template reference variable called #petForm assigned to the ngForm directive, this way we can access the form from the template.
- Two input tags:
- First one:
- Has id attribute related to for attribute from the label tag.
- Has name attribute that must be defined when we use [(ngModel)] with and element. When we submit our form value on onSubmit function, the value property name will coincide with the value set on this attribute.
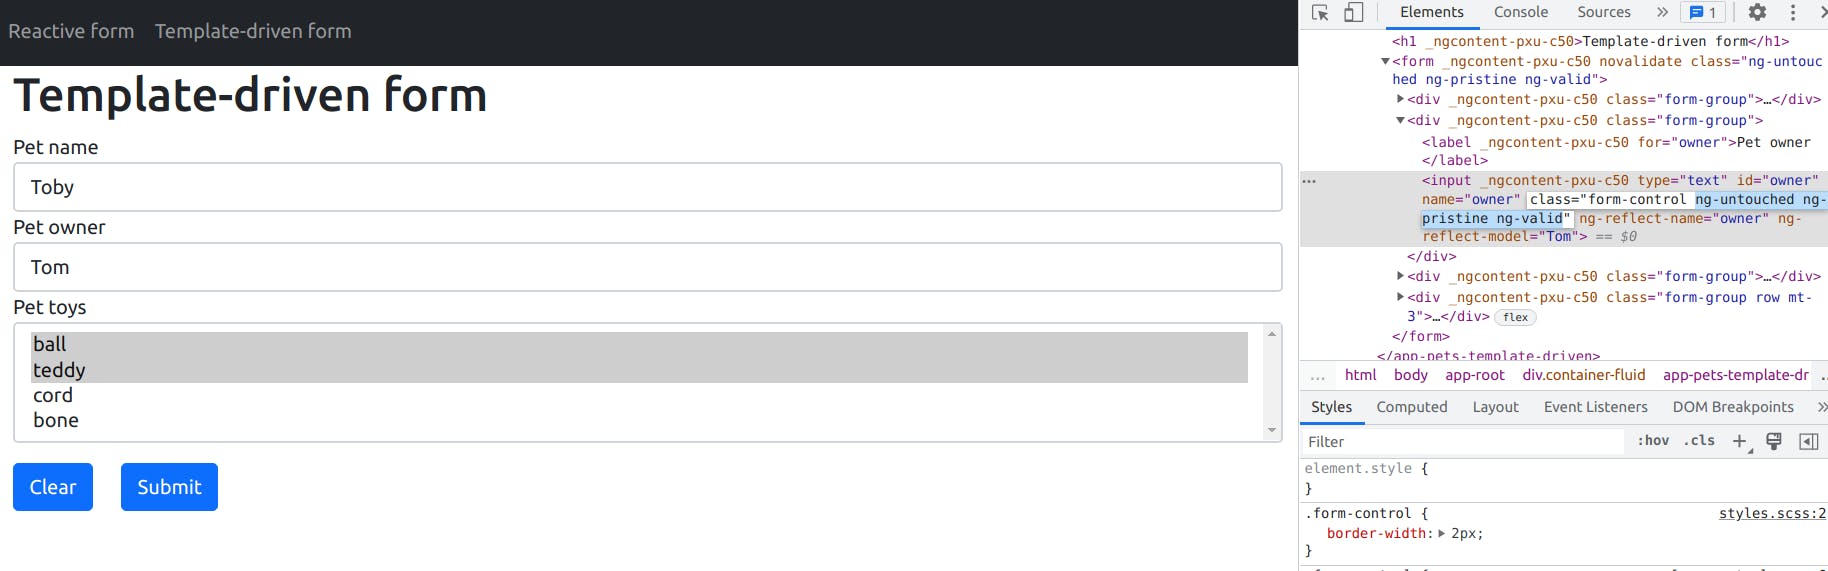
- [(ngModel)] two-way data binding allows us to have an object on ts file bound directly to our form, so we can not access the form value only from the petForm template reference variable but also from this object. In this case, the previously mentioned name attribute won't have an effect on the form value property name because it will be defined on the object itself as we will see.
- nameModel template reference variable assigned to the ngModel directive so we can access the implicit input-control.
- We use it to display the app-validation-message component or not depending on if the control value is valid (nameModel.valid).
- required attribute tells angular that this field is required so when the field is empty the ng-invalid class will be attached to the field and the defined classed on the styles.scss file will be shown. As we define the app-validation-message component it will be shown also if this control is empty.
- app-validation-message component that shows the passed message when one of the mentioned conditions is met.
- The second is similar to the first. Don't have anything special.
- First one:
- The select tag:
- It has the multiple attribute that allows selecting multiple values at a time.
- Clear button previously explained.
- Submit button that when is clicked it triggers the ngSubmit event and the form calls onSubmit function where we pass the form.value.
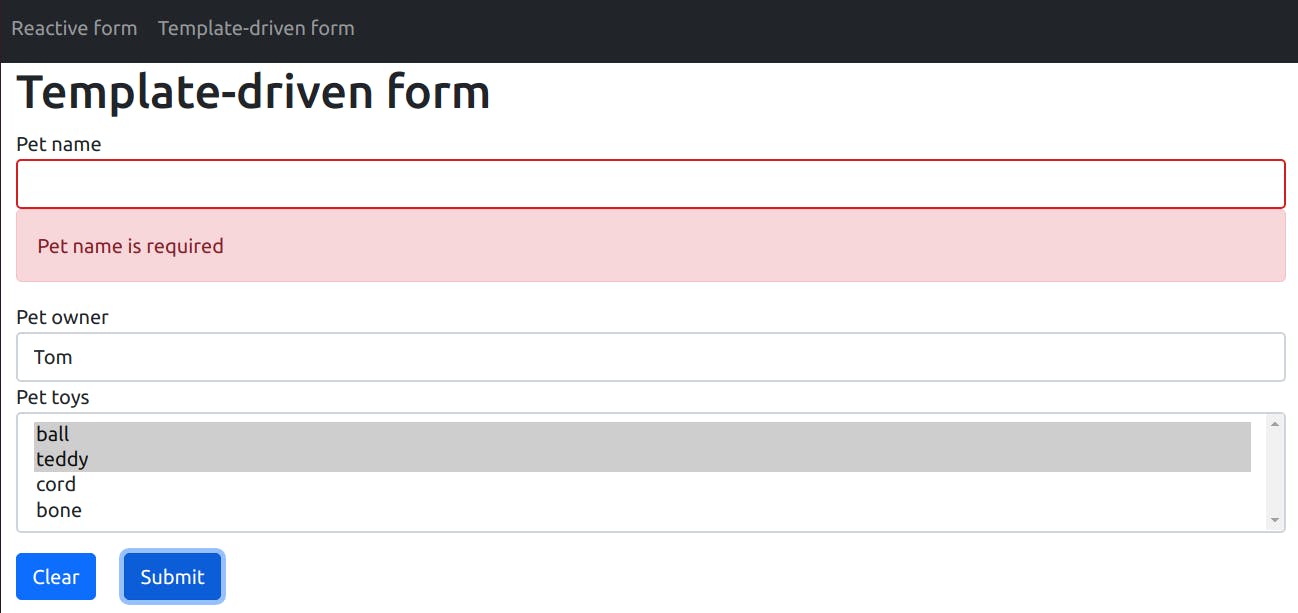
This is the result if the name control is empty (red color on input border and the app-validation-message component visible):
This is the result if any form-control value has changed (brown color on input border):
This is the result if the control has been visited (blue color on the input border):
The ts file related to this html file is the next:
// pets-template-driven.component.ts
import { Component, OnInit } from '@angular/core';
import { Pet } from './pet.model';
@Component({
selector: 'app-pets-template-driven',
templateUrl: './pets-template-driven.component.html',
styleUrls: ['./pets-template-driven.component.scss'],
})
export class PetsTemplateDrivenComponent implements OnInit {
actualPet: Pet;
toys: string[];
constructor() {
const pet = new Pet('Toby', ['ball', 'teddy'], 'Tom');
this.actualPet = pet;
this.toys = ['ball', 'teddy', 'cord', 'bone']
}
ngOnInit(): void {}
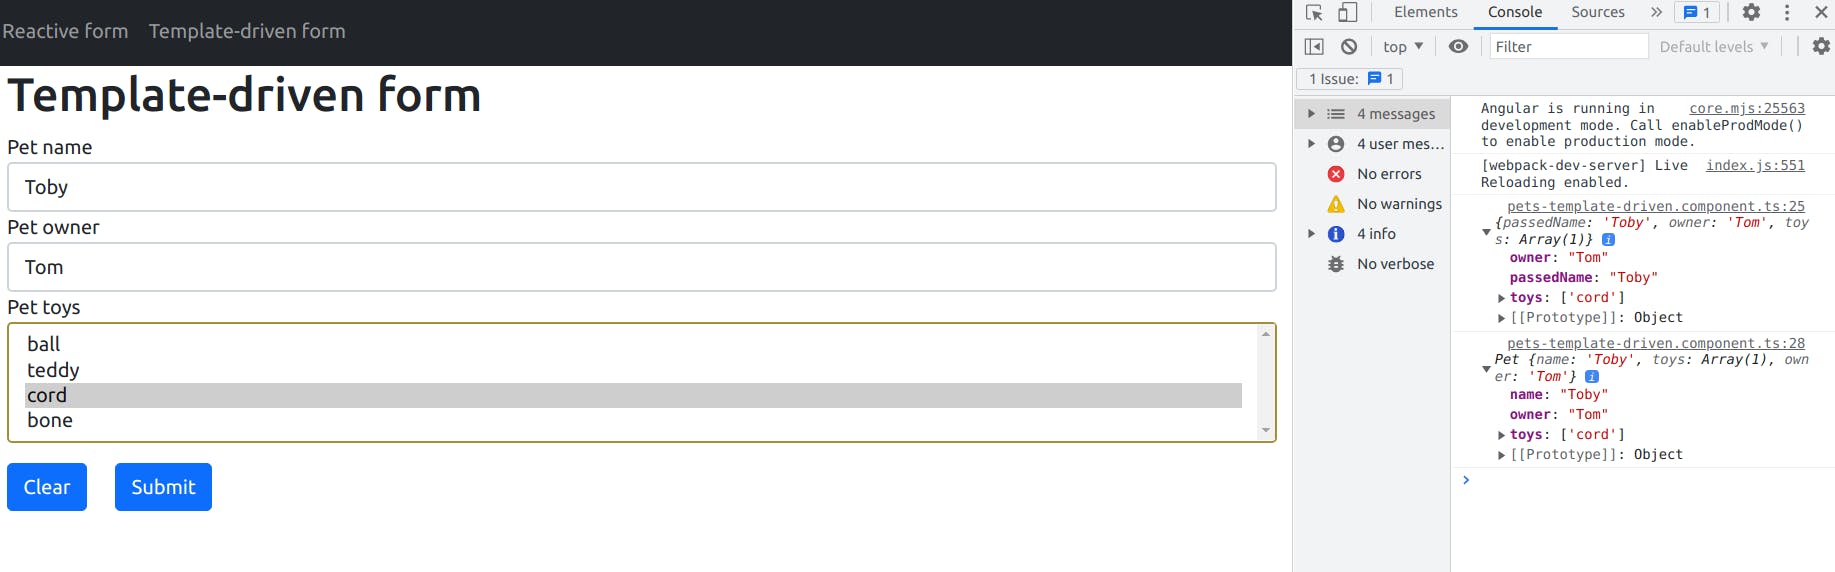
onSubmit(petForm: FormGroup) {
if (petForm.valid) {
// Two ways of getting form values
// First one passing as parameter from html. Property names coincide with name attribute of html tags.
// Check that name property name appears as passedName con console
console.log(petForm.value);
// Second one getting the binded model to the form
console.log(this.actualPet)
// Property values must coincide but property names can vary depending on the name attributes
}
}
}
On the constructor we define the select available options (toys) and a default pet to be displayed when the application is started based on a defined model:
We also see the onSubmit function that will be called when the user clicks the submit button. Here we are accessing the form value in two ways, with the [(ngModel)] two way data binding access (actualPet object) and the value passed on the function as we mentioned earlier. We can use the one we prefer depending on what is our purpose. The only difference will be that two way data bound object won't show the name attribute value as the property name of the form value and the form value passed on the onSubmit function yes. The console.log will be shown when the form validations are met.
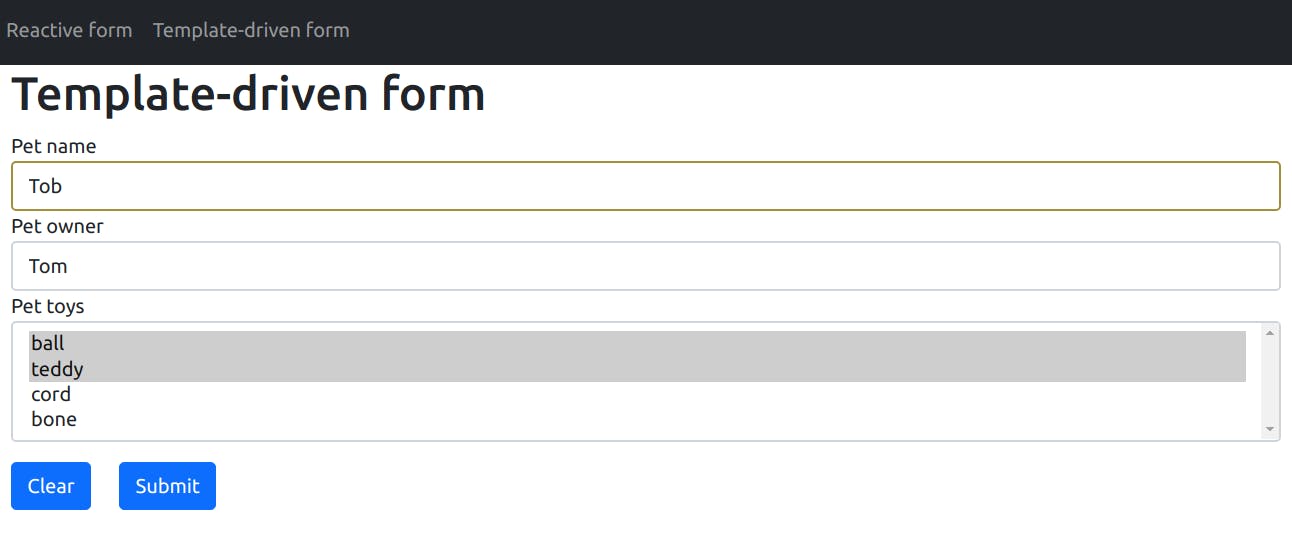
This is the result of clicking the submit button:
Bibliography: